As an airline pilot traveling across the globe one of my highest priorities when packing for a trip is not bringing a metric ton of stuff with me. The art of minimalist yet effective packing can be challenging. Thankfully a recent change has helped me pack even lighter while keeping my photography workflow very capable.
For many years I carried evolving versions of laptops as my primary editing machine. Looking back, a couple of those were basically bricks with a screen. As newer laptops became slimmer and lighter it was less and less of a burden but nonetheless even newer 15” laptops are not exactly light. The modern airline pilot carries what we call an Electronic Flight Bag or EFB that replaces all the paper charts we used to lug around in those bulky leather flight cases. Thankfully long gone are those cases & charts but a lot of us still carried a personal laptop along with our company issued EFB. That wasn’t bad, but I wanted to go even lighter. I needed a single device that met my editing needs and the previous EFB (hint, it wasn’t a capable Apple product) just couldn’t do it.
Thankfully my company switched to the iPad Pro for our EFBs and wouldn’t you know it this thing is small, light and capable of some serious on-the-road photo editing. Since the switch I’ve been able to leave the laptop at home and figured I’d share my editing process & thoughts on mobile workflow. Let’s see if a photographer can get away with just an iPad while traveling.

Editing on the road made easy with Affinity Photo and a good cup of coffee.
The Import Process
There are various ways to bring your photos into your workflow. Depending on what camera you are using a bluetooth connection via app or using Apple’s SD card reader can easily be used. The majority of the time I use the SD reader as it is much quicker for importing photos than wireless methods. If I have only a handful of photos I really want, I’ll use Fuji’s app to grab a few photos directly from my X100T via a WiFi connection. Speaking of which, the updated Fuji app is much better than its predecessor and actually works like a charm now.
Whichever method you choose, your imported photos will go directly to your Photos app in one large folder of sorts (more on that below) where you can access your images from within editing & sharing apps.
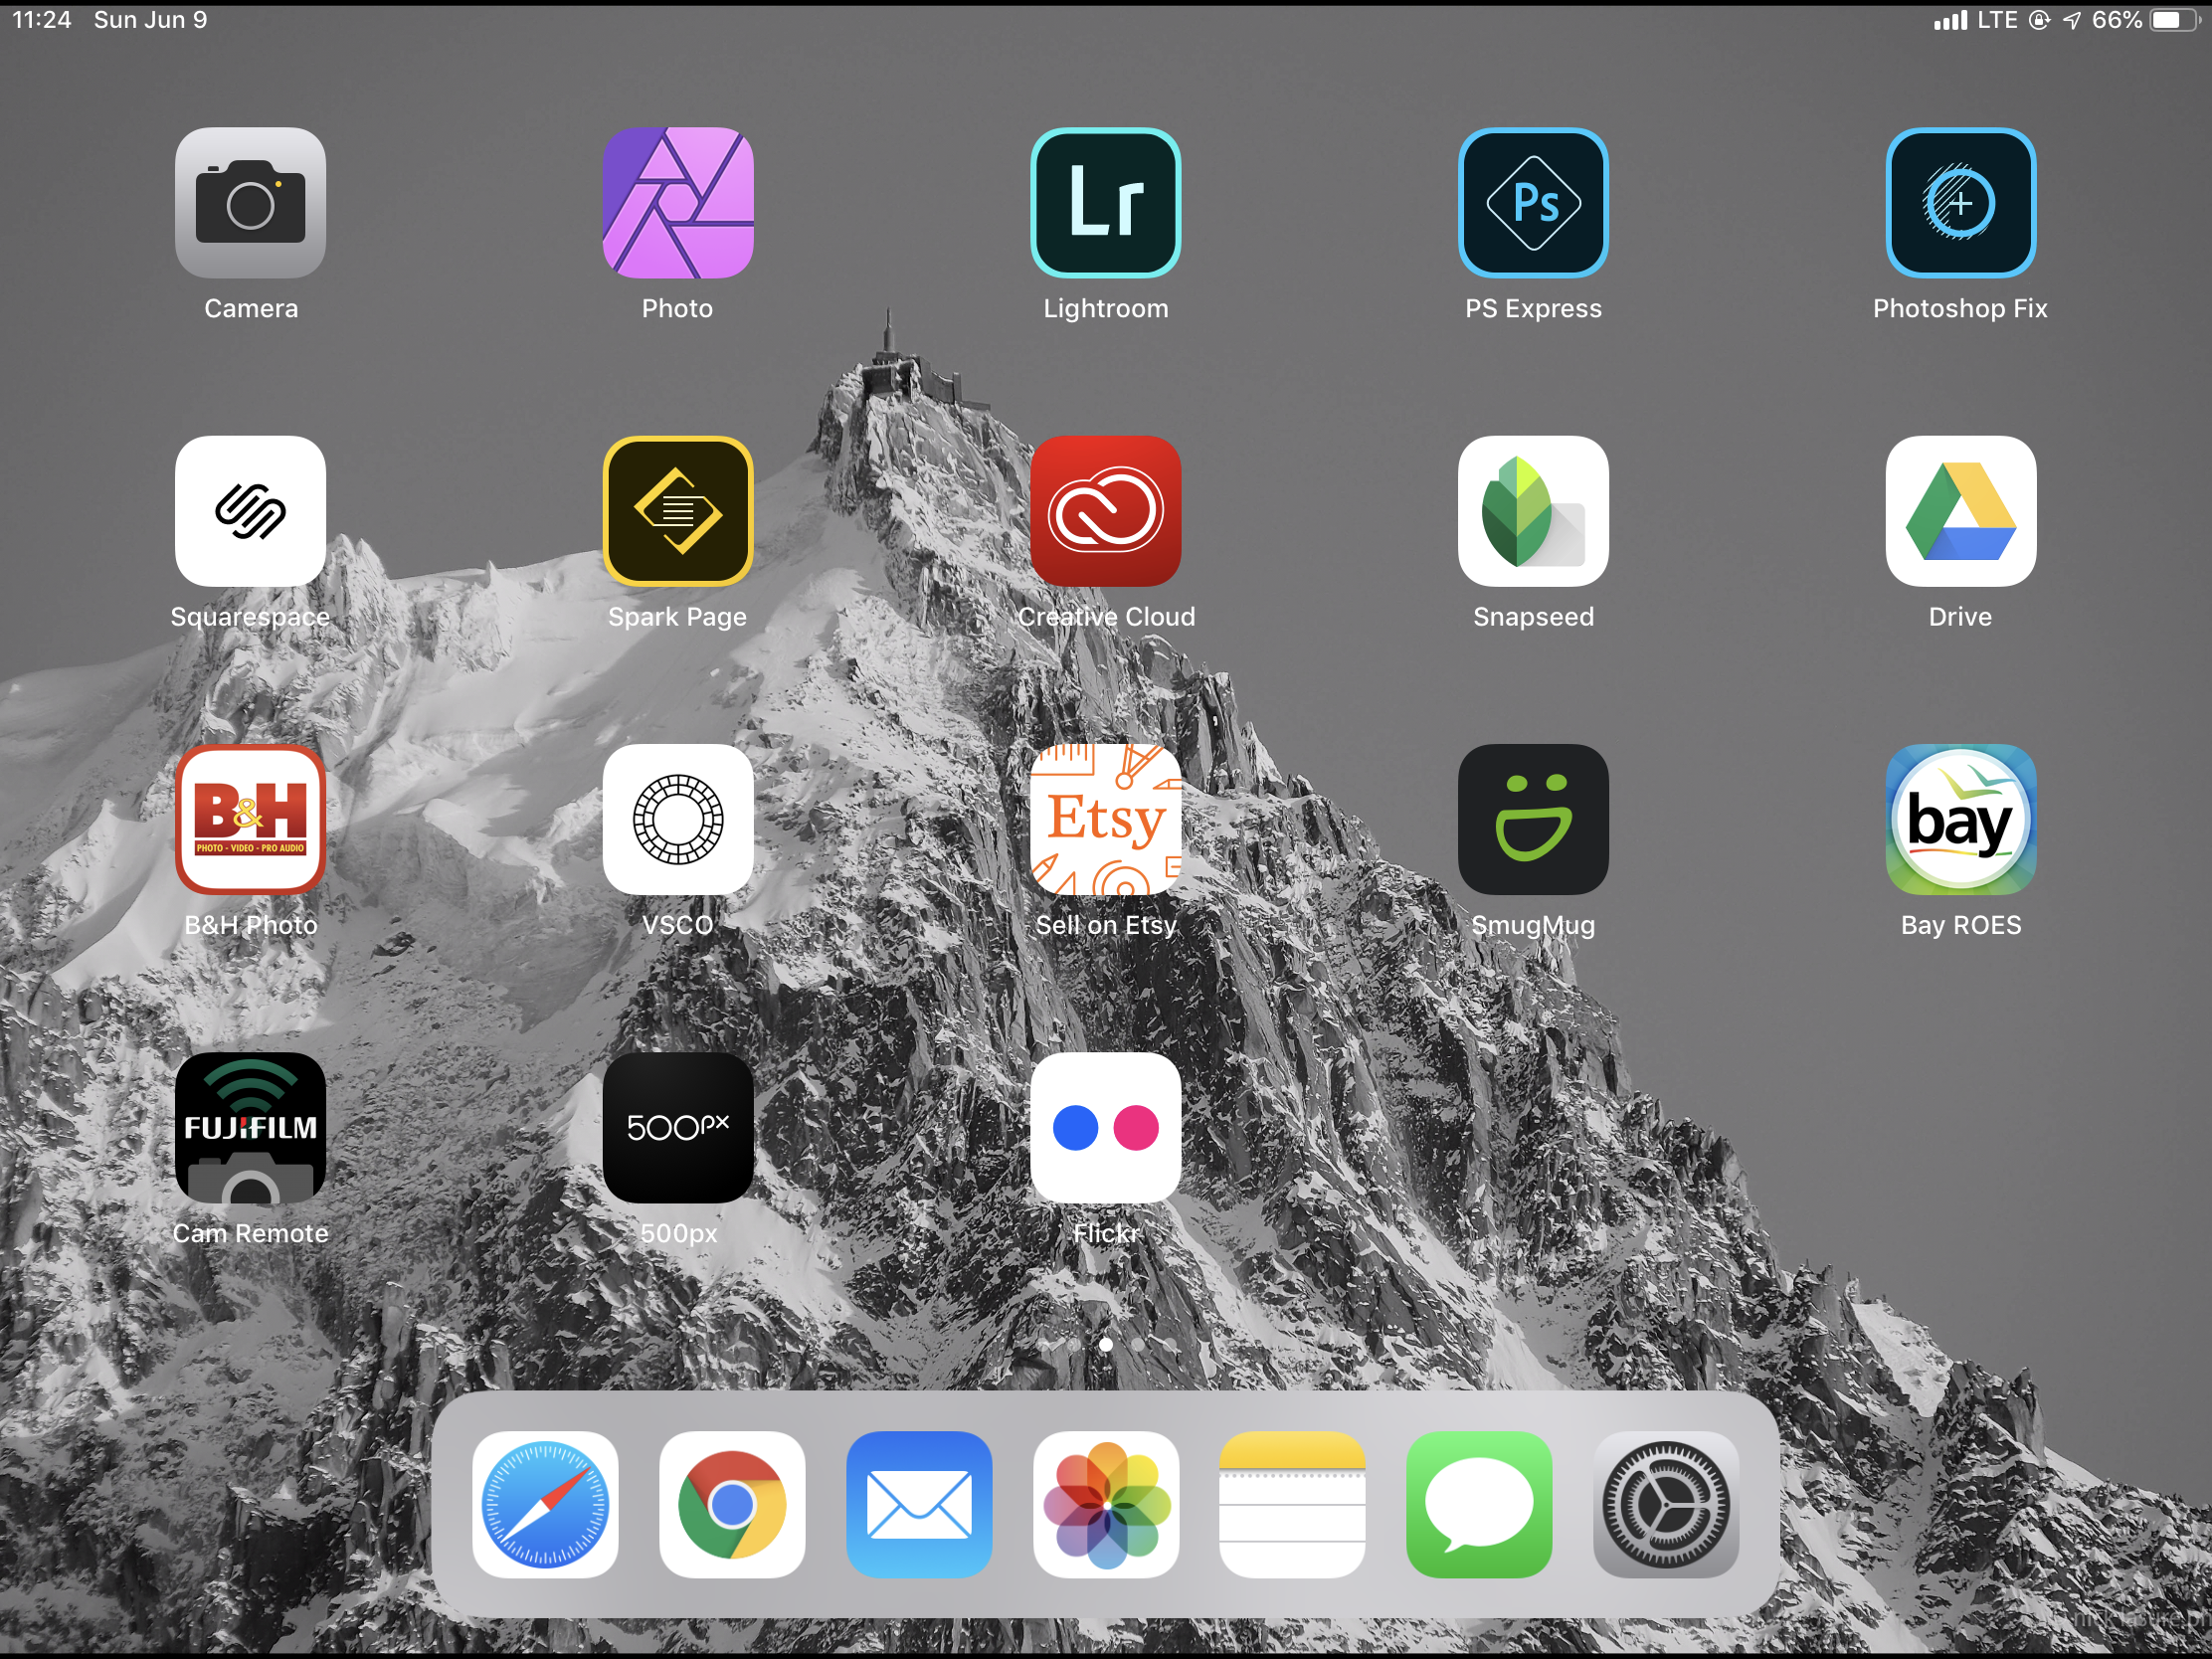
My photography app collection. The majority of my on-the-road editing, managing & sharing needs are easily met.

The things you find wandering about in the hutongs of Beijing - X100T edited in Snapseed.
Editing
There are a myriad of editing options available from ‘filter’ based apps such as VSCO or Snapseed (which also have in depth editing) to advanced options such as Lightroom and Affinity Photo. My go to apps are usually Snapseed and Lightroom, but if I need a more advanced set of features I’ll import to Affinity for things such as merging panoramas or focus stacking. In fact, Affinity’s focus stack and pano features make packing light even easier with the ability to stack images from my fixed lens X100T to get the wide aspect that is usually reserved for much wider focal lengths.
I try not to over-edit images, instead keeping them what the human eye saw since even the best cameras have a hard time reproducing the tones, saturation and depth we can see. So for my editing needs the iPad is more than enough and with apps such as Affinity one can utilize layers & masks to your heart’s content to make your images pop how you like.
Of course what good are your editing efforts if your screen sucks? While calibrating an iPad screen for printing isn’t really a thing you can adjust your brightness manually and using a reference image to watch for highlights and shadows will keep you in check. Generally the screen does a good job of representing the colors/tones you’ll see but for reproducible color & printing profiles you are best to keep that at home on your calibrated monitor.
Managing Pictures & Storing
One of my biggest complaints about iOS is the lack of a true file management system, you are basically dumping your photos into one giant folder with limited ability to do advanced sorting as you can do on a Mac or Windows based machine. While the ‘Albums’ feature is semi-useful it isn’t a replacement for a robust system.
Thus far I’ve managed to keep the overall numbers of my pictures low on my iPad only editing as I need and not using it for a dumping ground. One thing I’m considering is utilizing Dropbox more since you can import directly from Affinity and of course utilizing the options of Adobe Cloud services though I have yet to embrace that either. The good news here is that if you are invested in a cloud service already you have options for managing your library via the iPad.
For me, I believe the keep it simple principle applies here, import, edit, share and I’ll backup relevant photos once I’m home on my primary drives. This also keeps my images safe in case I lose my iPad while at work or it somehow gets ran over by a hotel van.

Sunset at the Egg in Beijing, edited with the Snapseed.
Sharing
Taking a photo is of course step 1, step 2 is editing and finally the most important is sharing your vision with the world. Which social app or venue you use is of course up to you, but working with the iPad makes sharing a snap. Most social apps are integrated into iOS not to mention the ability to Airdrop a photo right to your friend’s phone.
Other useful apps include a dedicated 500px app, Adobe Spark for making creative story driven pages and Bay ROES to send my images directly to my print lab. The iPad excels here at getting your images out to your adoring fans.

Twinkling Stars in Boston - Fujifilm X100T edited in Snapseed

Exploring Amsterdam - Fujifilm X100T edited in Snapseed
Additonal Needs
Aside from editing, what use is a device if you can’t easily write blog posts, plan locations shoots and spend too much time drooling over new camera gear? With handy accessories such as a bluetooth keyboard and the Apple Pencil writing blog posts and finer editing is a breeze.
I also utilize various map apps such as maps.me and the ever useful Google Maps for planning and exploring new places. Maps.me is a wonderful app allowing you download offline maps in case you won’t have data at your destination.
For editing my website I use Squarespace to manage all things you see here and thankfully they’ve just launched refreshed & robust app. Again an iOS specific app delivers and I’m able to manage my business and presentation to the world whilst on the road.
Final Thoughts
So can an iPad replace my computer on the road? Sure can! There are a few limitations but for most edits and everyday use I don’t miss lugging my laptop around at all. It’s proven to be more than capable and harnessing what it has to offer has a wonderful thing. Not to mention I can sleep better knowing my primary laptop is safely at home when I travel.


